Sunday, July 4, 2010

Scaffolding Arrives

Dunno about you but I have never given scaffolding much thought until I got the bill - £2,000 for an 8 week hire. Well call me cynical but where else can you get that sort of money for erecting the scaffold in a day then leaving at the customers site until finished at which point you spend another day dismantling and moving to the next paying customers site.  No storage costs, no maintenance (it don't rust believe me).

Anyroada just thought I'd get the obligatory scaffolding joke (er the only scaffolding joke I have ever heard come to think of it)...

Steve, Bob, and Jeff were working on a very high scaffolding one day when suddenly, Steve falls off and is killed instantly. After the ambulance leaves with Steve's body, Bob and Jeff realize that one of them is going to have to tell Steve's wife.
Bob says he's good at this sort of sensitive stuff, so he volunteers to do the job. After two hours he returns, carrying a six-pack of beer.
"So did you tell her?" asks Jeff.
"Yep", replied Bob.
"Say, where did you get the six-pack?"
Bob informs Jeff. "She gave it to me!"
"What??" exclaims Jeff, "you just told her her husband died and she gave you a six-pack??"
"Sure," Bob says.
"Why?" asks Jeff.
"Well," Bob continues, "when she answered the door, I asked her, 'are you Steve's widow?'
'Widow?', she said, 'no, no, you're mistaken, I'm not a widow!'
So I said: "I'll bet you a six-pack you ARE!'"
 I make nnnooo apologies for that - it's just so sick and so lame - bottom of the barrel.  OK I hear you are repulsed so let me share with you this little gem from Scaffold Safely a monthly publication for those...well...errr into their scaffold I guess?


Seriously though the scaffold has finally arrived ready for first lift - a term used to describe the height at which the builder has to physically start lifting materials above head height.  It is erected in sections and completely surrounds the ground floor walls now.  Derek keeps stressing to me now that the scaffold is here things will start to slow down simply because they have to first get the materials up to the top of the scaffolding before the brickies can start walling again - and he means literally everything from tools, cement, blocks and stone - the lot has to be hand-balled up each level (or lift).  The scaffolding also gets erected in sections as the house rises up, level by level.

Still it's good to see that my youngest find a use for the scaffold - as a ballet bar - before promptly being told off and lectured of the dangers.  Fortunately for everyone the scaffold had only just been erected that day and there were no foot boards or materials on it.  KIDS!!!

First Floor

Well I hope to have many more floors but your first is always the best!  Seriously Derek and his gang have been very lucky with the weather as we all have.  I really could not have picked a better time to start building - no torrential and persistent downpours rendering the building site a mud bath.  Just day after day after day of beautiful British sunshine!

We are now reaching first floor level pretty much all the way around the house - that sounds odd but trust me builders have a habit of starting sections then for no apparent reason starting another section at the opposite end of the building...I thought this was to mix it up and add a little variety into what looks like a rather boring job of laying stone after stone after stone.  WELL WHAT THE HELL DO I KNOW!


The method in the madness is to ensure that all of the corners of the house are built to the same specification in terms of height from the foundations so that all of the courses of brick are perfectly horizontal.  If they didn't jump around then they could find themselves laying courses of stone around the perimeter of the house only to find that the course of stone doesn't line up - and that would look a buggers muddle!

No need to worry - Derek and Mick got all external corners to within 1mm of each other.

All of the good weather is starting to have some pretty dire effects on some of the houses that other builders are constructing.  Of particular problem and concern to me is the story that those lovely quoins have started to slide out of position on some of the other houses - specifically on south-facing walls which have been laid in hot temperatures.  Speaking to Steve and Rand & Asquith he said the solution is simple - "Frog 'em and they're goin' na-where".  Frogging is a term used to describe the hollow cup-like shape on the underside of a brick.  The frog allows the brick to be walled creating a mound of mortar underneath the frog - this raised mound (invisible to the eye) prevents the brick from sliding around - simple!

Of course but how the hell do you frog a quoin that has been cut from the earth and is as hard as bloody nails?  "Well..." said Steve, "we can frog your quoins for you for a sur-charge of £6 per quoin frogged if you like?".  "And what if I don't like?" said I.  "You can frog em y'self wi' a Stihl saw if you are handy with power tools but don't cut y' fingers off coz y'blood 'll stain the stone".  Not that I'm tight or anything but I've got ten fingers to go at - the picture below shows a frogged quoin done by moi!

Romancing the Stone...


A respectable smash hit movie of the 1980's relaunched the career of Michael Douglas and catapulted Kathleen Turner into instant stardom.  This romantic comedy....woah...hang on a minute...not that romancing the stone!  Look if you really want to know what the hell I'm talking about pop over to YouTube and have a gander at the trailer to refresh your memory (Romancing The Stone Trailer) and if none of this makes any sense wait a while - apparently a remake of the original film is in the works and is expected to be released next year.  You heard it here first folks!

No the stone I've been romancing about (having spent many months trawling the quarries across West Yorkshire) has finally arrived and it looks stunning!


Just look at the strata and the different colouration from pale buff through to dark grey.  Steve Rand, co-owner of Rand & Asquith Quarries up at Hove Edge has picked out some real gems.  The picture you can see above are the quoins which will be used to make up all of the external corners of the house.

You see the knack with cost-effective house building is all in the design and selection of the material.  As you will see in later pictures the quoins are cut at a very specific height of 290mm.  This height is exactly the same as a concrete block (used for the internal walls) and is the height of two walling stones.  So when the quoins are set out at the end of each run of wall the brickies job is made an awful lot easier because for every quoin laid they can wall two course of stone with minimal cutting - just like Lego - but the overall look is anything but!

To explain the concept have a closer look at the photo below.

The added benefit of adopting this system is that time is not lost dressing external corners (apart from openings) so in theory if you pick a decent builder the house structure should rise pretty quickly.  Oh and just before I go the saying goes "every cloud has a silver lining" well in the case of all new build houses this lining comes in the form of silver-foil backed insulation which is held to the internal block work preventing it touching the outer skin.  So effectively you have the decorative outer stone which provides the weather-proofing, then a cavity void then 50mm of Kingspan thermal insulation barrier then your internal blockwork...I should be nice and toastie this winter!

The picture below shows the insulation held to the blockwork with space invaders - the blue disks which clip neatly onto the wall ties (metal wires that prevent the stone from falling away from the internal blockwork - really important but dead simple - I bet the guy who invented the space invader disks is worth a few quid now!

Youth Training Scheme

Apologies to those who are following this blog for not publishing any blogs for the best part of a month.  Unfortunately things have gone a bit craz-eey at work lately and bloggin has been the last thing on my mind.

Anyway you will see over the next few posts that things are really starting to motor very quickly now and the number of minor (and sometimes major) decisions we're having to make is unbelievable and quiet scarey!

For those of you with a good memory you will remember me bleating on about how important it is to fill all of the gaps between the blocks with mortar because this improves the overall air tightness - well so determined am I to obtain a better than average score on the test that I have now hired in some help in the form of Jessica my youngest daughter.  In the photo we are filling in the gaps in the living room - Jess is mixing the cement and I'm blathering it into "hungry joints" - these are joints where the builders haven't quiet got enough mortar in the vertical (if there were gaps in the horizontals I'd be worried).  I'm paying good rates for brickying so it's more cost effective I do this fiddly job - besides it's one of the jobs you can't really get wrong or do any damage with!

The shape of the ground floor can be seen here as the internal wall structure really starts to bulk out the house - the old orchard suddenly doesn't feel anywhere near as big as it used to.

The ground floor window you can just about make out is the study - just a few more courses of block and that will complete the ground floor ready for the outer skin of stone to be brought up to the same height and then the first floor joists can be installed.

The next big expense is scaffolding...

Wednesday, June 9, 2010

Doing My Bit

As part of the new Building Regulations all new build houses must provide details of energy efficiency they are targeting at design stage and then have this checked for compliance at completion.  In addition you also need to conduct an Air Leakage test too.  There are yet more professionals offering up services to complete these for you and by the sound of it it's not something you can DIY.

It pays to shop around.  NHBC wanted approx £500 for all of the reports but I managed to get the lot for just under £300.  It also pays to ask questions and as my mum always used to tell me "if you don't ask you don't get".  In particular a really cheap and easy way of increasing your chances of passing the Air Leakage test and upping your houses Energy Rating is simply to ensure that all of the joints between your internal brick work is fully pointed up.

The guy at EPS Group was really helpful and he told me a story of a self builder who went round at the end of each day and filled in all of the gaps in the pointing on all internal walls and at the end of this his house was the air tight he very nearly had to install additional mechanical ventilation so he didn't suffocate - a bit extreme but none-the-less I'm all for making my house comfortable and cutting down on those unpleasant drafts from under the skirting boards and around windows.  Let's see if this makes any difference at the end.

This is no criticism of Derek or Pauls work and in fact when I checked their work there was hardly a gap in sight - great work guys ;¬)

Still it matters not a jot if you can't lay a level course of blocks!

It's all starting to gather pace now and decisions are having to be made very quickly.  The house is now turning 3-D and the rooms are starting to take shape.  In the picture above I'm standing in what will be our Lounge - OMG!!!!

Walling Up

One things for sure I'm starting to pick up the building trade lingo now - life will never be the same - I've even started noticing the different types of stone course used, whether it's dressed or sawn and I can now name the quarry certain houses are built from.  You start comparing build quality and can see where builders have cut corners by not mixing the stone off pallet.

Anyway I digress this week I have been on holiday...well for me it's been more like a Busman's holiday!  I spent a few days helping the gang with walling the foundation blocks - well actually labouring with James.  OK I admit making cups of tea and doing a bit of digging and fetching all helps BTW.

Whilst Paul blasted out meter after meter of walling (and trust me the foundation blocks weigh a bloody ton), Kerry spent the day "faffing" with the Bay Window - still it looks nice Kez honest!


After a couple of days the walling had been completed, levelled off ready to take the Byson beam flooring - a recent innovation in the building industry now common place with majority of new build houses.

It comprises of an inverted T concrete reinforced beam that sits on foundation walls and is in-filled with concrete blocks to create a solid flooring system on which internal walls are built to frame your rooms.

Things are really starting to take shape now and for the first time the paper drawings done by the Duncan (my Architect) come to life albeit still very much in 2-D.

It was at this stage that we got the urge to extend the size of the kitch and make it even wider so my wife could have an island feature in the middle of the kitchen-diner area.  We drew out the extension with blue ground spray paint and started sketching the kitchen layout on the floor - it looked amazing.  A quick call to Duncan on Sunday and he popped out to inspect and confirmed it was feasible from a structural design perspective BUT advised we discuss with Derek and our building inspector as planning amendment was likely.  Not perturbed by this I made a call to a friend of mine who is on his 40th house build already and he said that for extensions (which is what this effectively would be treated as) you can increase the footprint by 3 square meters for a semi-detached and 4 square meters for a detached property without requiring planning permission.

DILEMA - if we were to extend now was the time to do it so we either asked Derek to crack and extend the footings and foundations and then seek retrospective planning permission and building regs approval OR we engage all the relevant stakeholders first and risk stopping the build dead in it's tracks.  Decisions....decisions...my wife and I then recalled our moto - "keep it simple stupid" and instead of letting our heart rule our head we decided against the extension - besides which Derek flipped his lid and started spouting words of wisdom - the time to change is during design not build - and then I remembered all of the heartache I had as an IT Project Manager whenever the business changed requirements mid-way through.

I may live to regret this BUT if I do at least I'll be sat in my new house reflecting on what might have been rather than risk the entire build and not have anything to show for it - risk management real world!

Anyway the floor is now down and we are officially out of the ground - major milestone accomplished with relative ease and we're £7K under budget (Derek take note for when I start over-specifying on the finishes
!).

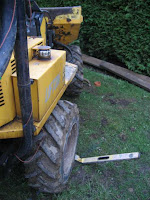
Weather has turned slightly this week and with all the site machinery running too and fro my lawn is starting to chew up...so in time honoured tradition - Custers last stance and all that we erected our defence!

Trench Warfare

They say that the two areas where money is made or lost when building is getting out of the ground and internal finishes.  You have far more control over the latter by simply compromising on the luxury items such as the100" Plasma TV you've always dreamed of, the grand staircase, the antique oak flooring, the granite worktops etc.

BUT the one thing you cannot compromise on is the foundation work.  Once you have committed spade to soil and start digging the footings (the trenches that will take the foundation walls) you have to solve every problem mother earth throws at you...it becomes a war...you have to get out of the ground otherwise you can't built your dream home.

Of course you can buy all sorts of fancy professional services that will assess likely problems before you encounter them - mining reports, contamination reports, percolation tests, drill-holes to locate depth to solid ground.  The list goes on and they are not cheap - you can literally spend thousands trying to mitigate the risk but the bottom line is you have to commit at some point - it's often a bit of a leap of faith.

Fortunately lady luck was on our side when Derek and his team started digging the footings - oh and the weather has been fantastic - long may it last!

Within a short space of time we had hit relatively solid clay-based soil and a quick assessment from the Building Inspector and NHBC Inspector confirmed that they had reached acceptable sub-soil depth and could continue excavating per the house footing plans.

The whole process was made real easy with the machinery.  The bucket on the mini-digger was set at the right trench width, the mini-dumper was nimble enough to shoot around the site dispersing yet more muck whilst James ensured the trench bottom was nice and level.

Amazingly by the end of the day all trenches were completed ready for the concrete pour.

I had only been working in London for two days and by the time I got back 2 loads of concrete had been shot into the trenches, laser-levelled, foundation blocks ordered and the site cleared ready for Monday to start walling the foundation blocks on which the entire house will sit.

There's no messing with Derek - he runs a slick and tidy building site and my lawn still resembles a lawn (for now).  He keeps telling me it's all in the preparation and planning and with a site this large it costs money constantly moving materials around so he likes to have everything exactly where it needs to be when it's needed.

 How neat is that!!!